 In a pinch, you can make a tactical tomahawk without a forge. There are multiple scenarios where having the knowledge of how to make a tomahawk can play out to your advantage. They are primitive tools that are great for personal protection, hand to hand combat and chopping kindling for the fire. They can be used in the field for a host of reasons where a knife just won’t “cut it”.
Tomahawks are still used in hand to hand combat by the US Army Rangers because they are easy to carry, easy to use and can be thrown with a certain amount of accuracy. The difference between a tomahawk and an axe is that the tomahawk has a shorter handle that makes it easier to throw.
There are two ways you can make one; one is with metal if you have the tools and the time the other is the most primitive way with stone.
Of course, if you are caught in a pinch making one from the stone will likely be your only option. Both stone and metal are discussed below.
Metal Version
If you have any skills at all with cutting and welding, then you can easily create this one in a couple of hours. This is the tomahawk of choice whether you just need something manageable for the yard or you want to be prepared in case something goes terribly wrong.
You will need some tools and materials:
- A sheet of scrap steel 4 inches by 5 inches and ¼ inch to 3/16 of an inch
- A wooden dowel that is hardwood and 1 inch by
- 1-¾ inch pipe coupling
- Metal cutting blade
- Metal grinder
- Welding table with clamp
With a couple of cuts and a little bit of welding, you will have a homemade tomahawk that will rival the best store bought model out there.
 Step 1
The first step to creating your tomahawk is to cut the metal into a “tomahawk head shape”. Mark your metal sheet to look like this:
Step 2
Using a metal cutting blade cut out the pattern of the blade. Once you have your pattern cut out use your grinder to sharpen the wide edge that will become your blade. Next up is welding.
Step 3
Once you have your edge nice and sharp, it is time to attach the pipe coupling to the small end. The coupling is going to be your “thimble” to slip the handle (dowel) into. Using a welding table and clamp attach the coupling
Step 4
The dowel will not be able to fit till you take the end down a little bit. You can sand the end little by little until it fits in the coupling snuggly.
You now have a homemade tomahawk.
Stone Version
 The stone version is a little more labor intensive, but it is certainly something you can do in the field in a pinch. You will need some materials:
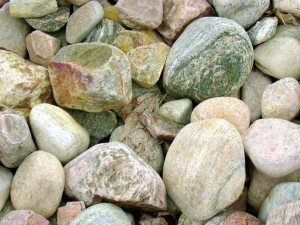
- Three stones, one that is sort of flat and large enough to be the head and one that you will use for pounding (a pecking rock) and finally one that you will use for grinding.
- Some post
- Sinew or leather
You will need to find a stone that is not cracked, that is flat, and that is strong. You will also need a stone that you can use to pound the flat stone that will be the head. You will want to pound the stone head gently but with enough force to shape the stone into the head. Be sure to use a log underneath for your pounding board.
Tip: Choosing a stone (or blank) that is already a similar shape to you hoped for the end result will make the pecking easier.
Once you have your shape, you will use your sanding rock to grind the edge of the blade. A good rock is one made from granite or sandstone.
It may take you a while, but you will end up with a tomahawk head that will work. You can secure your tomahawk head with leather straps or sinew to the post that you picked.
Tip: choose a post that is about 1-2 inches round and no longer than 17 inches so that it stays balanced.
A primitive version is a weapon that you can put together anywhere. You do not need special tools. Having the knowledge to put together this tomahawk can be the difference between surviving and not.

