[Update] This post was updated on [last-modified]
Most experienced gun owners know the importance of gun bluing.
Bluing is a process by which steel is protected from rusting by passivation. It gets its name from the blue-black color this process imparts on the metal.
While you might have heard of gun bluing, or even owned blued firearms, what you may not know is how to do it yourself.
If you need a whole firearm done, you might want to ask a gunsmith to help you. A nitrite bluing, for example, will give your gun a protective and appealing, glossy finish.
However, you can also blue a gun right in your own home!
Gun bluing options
There are numerous methods of steel bluing. These include the following:
- “Cold” bluing: Uses a selenium dioxide-based compound that turns the steel black or dark grey. It offers less rust protection than other methods, so it’s typically used for touch-ups. This is a common way to add some protection to areas where the bluing has worn off
- “Hot” bluing: Uses an alkali salt solution called “Traditional Caustic Black.” It’s usually done at temperatures ranging from 275 to 311° F. This method is popular in commercial production and offers better rust-resistance than cold bluing.
- “Rust” bluing and “fume” bluing: Results in the best rust and corrosion resistance. The oxidation of the metal forms magnetite (Fe3O4), which is the a black oxide of iron.
Deciding whether to blue
Decide if and how much of the gun needs to be reblued. For minor wear, a cold bluing kit may be all you need. If the gun has never been blued, or you want to ensure a consistent finish, you might opt instead to blue all of the steel components.
Some things you should take into consideration before bluing your firearm are the age, value, and material of the gun.
Vintage guns generally sport rust bluing or fume bluing. Adding a patch of cold bluing to such a finish will look out of place. They also sometimes feature silver soldering or brazing that cannot be hot blued.
The cost of the gun, and how you intend to use it, are also important factors to think about. Is this an antique or a modern gun? Is this your carry weapon, or an investment piece? Modifying your firearm will affect its value. It might be best to leave the care of vintage guns to a professional if you aren’t particularly experienced. A messy job will make the gun difficult to resell.
On the other hand, if this is your carry gun, bluing is a great way to protect it from rust. A gun you have on you everyday, however, is prone to wear and may need another touch-up later on. Keep this in mind when choosing the bluing method.
How to prepare your firearm
The preparation step depends largely on how you’re going to blue the gun. For a simple cold blue touch-up, you don’t necessarily have to take it apart. For a thorough bluing, you’ll have to detail strip your firearm. Set aside any wood or plastic parts and springs.
Some forms of bluing only change the color of the metal, whereas others are a form of controlled rusting.
Don’t plug the bore when doing hot caustic bluing. Heat expansion can cause the plugs to blow out. If you are doing a slow rust bluing, plug the bore to protect the rifling. Any non-cosmetic changes to the metal inside the barrel will compromise the accuracy of the gun.
To prepare the steel, you can sandblast the parts of your firearm you’re going to blue. When blasting the barrel, avoid going down the inside and just do the exterior.
If you don’t have access to a sand blaster, don’t worry! A good scrub with steel wool or sandpaper will clean up the metal just as well. This will remove any old bluing, rust, scarring, or pitting, and give you an even surface to work with. You can use 000 steel wool or 600 to 1200-grit sandpaper to polish the steel.
After you are happy with the finish, clean everything with some rubbing alcohol (at least 90%).
If you are re-bluing your gun, it’s best to remove the original finish. You can do this by placing the steel parts in a half vinegar, half water mixture. Boil them in a steel pot for half an hour.
The deep fryer method
Caution: It’s very important to note that the gun must not have any aluminum or any other non-steel parts, even a thin plating. It absolutely must be bare steel. This is because some alloys will react with the salt in the solution and give off extremely dangerous fumes. If raw aluminum goes into the mixture, fumes maybe the least of your worries. It will likely cause an explosion.
The gun bluing process
Start with 1 gallon of water and add it to a deep fryer that has been thoroughly cleaned. Add 5 ½ lbs of regular table salt to the water. Turn the heat on and give a good regular stirring until it gets very hot and starts to steam. Use a steel tool to stir (remember the fumes).
Allow the solution to heat up (this should take around 15 to 20 minutes). In the meantime, place all the parts into the basket. Please note that the baskets that come with deep fryers are often zinc-plated. These cannot be used unless you want to have a very bad day. Ensure the basket is stainless or regular steel.
Once the salt solution is bubbling away happily, it’s time to drop the pieces in. (It should be set on the highest temperature for best results, around 375 to 400° F.) Bear in mind that cold steel will cool the solution and it will take a few minutes for the temperature to rise again. A total of 10 to 15 minutes should be enough to get a nice finish on the gun.
Getting the results you want
It is up to you so keep checking the finish. When you are happy with it, take the pieces out. If you want to go a little further, leave them in a bit longer. It’s as simple as that! Drop the pieces into a bucket of cold water to cool them down.
Some guns have different grade steel for different parts, and some may be lower in carbon than others. This will affect the color of the respective parts. Don’t be surprised if the bracket for the sights has a slightly different hue than the barrel, for example.
The color should be nice and deep, the finish super smooth, and the overall look fantastic.
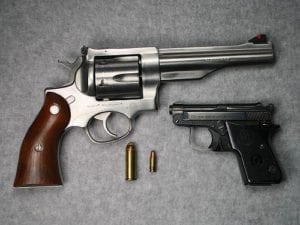
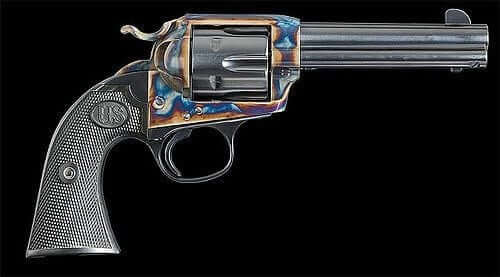
Image credit via Flickr Creative Commons: Chuck C. and turnbull_restoration.
Alternative gun bluing methods
Stump remover (with potassium nitrate) can be used to blue your gun on the stove in the kitchen. Clean the metal, then boil the parts for around an hour until you get the color you want. Remove the steel from the pot, then oil and clean.
Another option for bluing gun parts is to use a blowtorch instead of a hot salt solution. This method is very straightforward. Simply clean and oil the steel, then heat the metal until it changes to the color you’re looking for. This method takes a little more practice in order to achieve a uniform color.
Having the blues can be a good thing!
Don’t be afraid of bluing your firearm where appropriate! You’ll be surprised how easy it is and love the results. There are a lot of ways to go about it. Personally, I would highly recommend using the hot salt solution method as it provides a more uniform appearance. It really does look like a professional job. Just be sure to exercise caution whenever you are working with volatile chemicals and high temperatures!
Additional Resources
Related Articles
Are you looking for a tactical vest that can hold your gun and all that extra ammo? Check out my recommendations on the best tactical vests!